This article introduces the basic concepts of Apache APISIX and the Service Registry, and shows you the practice of Nacos service discovery on API Gateway.
Background Information#
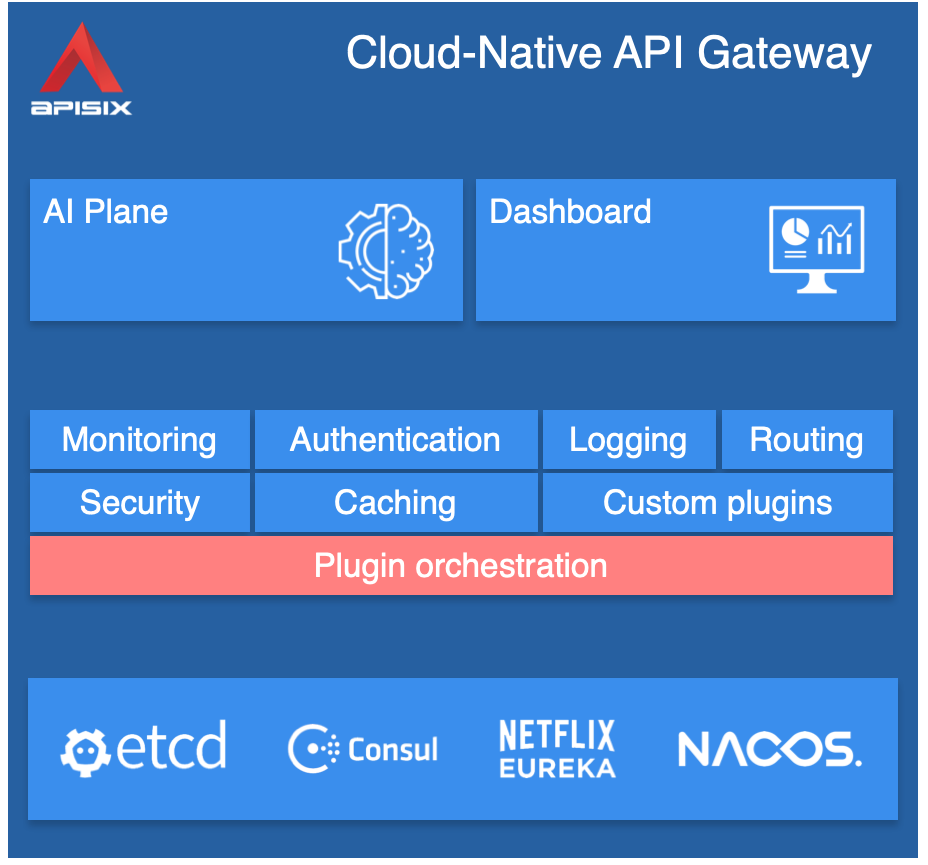
Apache APISIX is a dynamic, real-time, high-performance API gateway that provides rich traffic management features such as load balancing, dynamic upstream, canary release, circuit breaking, authentication, observability, and more. It not only has many useful plugins, but also supports plugin dynamic change and hot swap. At the same time, when using service discovery components, you can not only use etcd, but also Eureka, Consul, and Nacos as service discovery components. This article will introduce you in detail how to configure Nacos in Apache APISIX as a service discovery component in Apache APISIX API Gateway.

Service Registry is the core component of service management, similar to the role of directory service, and one of the most basic facilities in the microservices architecture. It is mainly used to store service information, such as service provider URL, routing information, and so on. The service registry is implemented by mapping complex service-side information to simple and understandable information for the client.
The core functions of the Service Registry are as follows:
- Service registration: Service providers register with the Service Registration Center.
- Service discovery: Service consumers can find the call routing information of service providers through the registry.
- Health check: Ensure that service nodes registered with the service registry can be invoked normally, and avoid the waste of call resources caused by invalid nodes.
The registry is essentially to decouple service providers and service consumers. In the microservice system, each business service will call each other frequently, and the IP, port and other routing information of each service need to be managed uniformly. But how do you manage it? You can provide information about existing services to a unified service registry for management through the Service Registration function of the Service Registry.
From the above description, you can know that the registry can help users quickly find services and service addresses through mapping. As business updates iterate, services change frequently. Clients can still pull a list of services through the service discovery function of the registry after registering new services or service downtime on the service side. If the service node of the registry changes, the registry sends a request to notify the client to pull again.
If the service on the server side suddenly goes down and there is no feedback to the service registry, the client can show the service side its service status by actively reporting the heartbeat at regular intervals through the health check function of the service registry. If the service status is abnormal, the service registry will be notified, and the service registry can remove the down service nodes in time to avoid waste of resources.
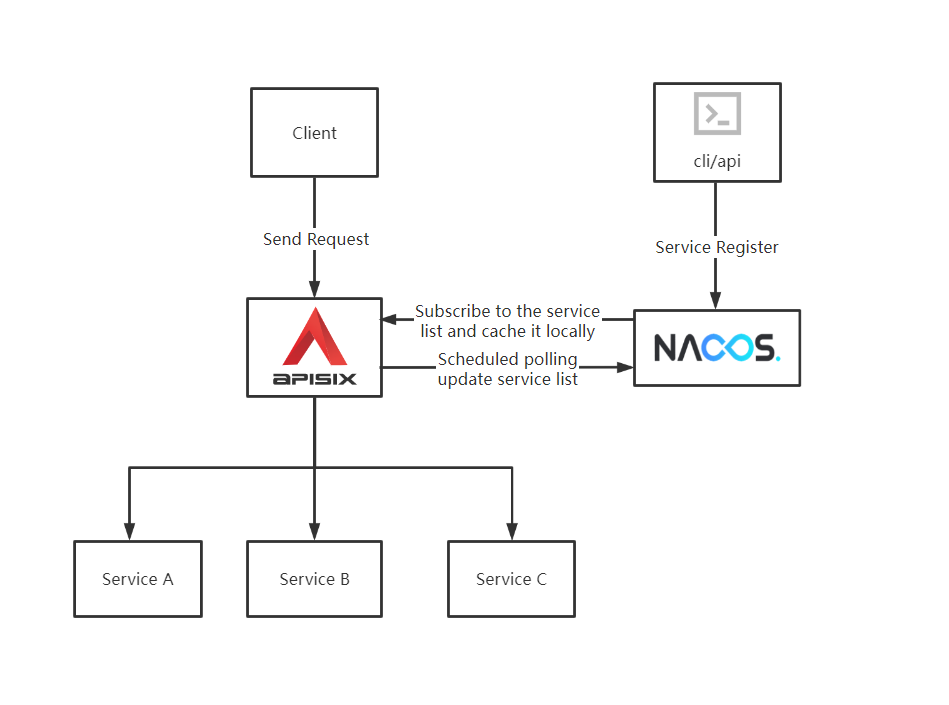
Apache APISIX + Nacos can centralize business-independent control of each microservice node into Apache APISIX for unified management, that is, the ability to implement proxy and routing forwarding of interface services through Apache APISIX. After registering various microservices on Nacos, Apache APISIX can get the list of services through the service discovery function of Nacos, and find corresponding service addresses to achieve dynamic proxy.

API Gateway Integrates Service Discovery Based on Nacos#
Prerequisites#
This article is based on the following environments.
- OS: Centos 7.9.
- Apache APISIX 2.12.1, please refer to: How-to-Bulid Apache APISIX.
- Nacos 2.0.4, please refer to: Nacos Quick Start.
- Node.js, please refer to: Node.js Installation.
Step 1: Service Register#
Use Node.js's Koa framework starts a simple test service on port
3005as upstream.const Koa = require('koa');const app = new Koa(); app.use(async ctx => { ctx.body = 'Hello World';}); app.listen(3005);Register the service on the command line by requesting the Nacos Open API.
curl -X POST 'http://127.0.0.1:8848/nacos/v1/ns/instance?serviceName=APISIX-NACOS&ip=127.0.0.1&port=3005&ephemeral=false'After service registration, use the following command to query the current service.
curl -X GET 'http://127.0.0.1:8848/nacos/v1/ns/instance/list?serviceName=APISIX-NACOS'
Examples of correct returned results are as follows:
{ "name": "DEFAULT_GROUP@@APISIX-NACOS", "groupName": "DEFAULT_GROUP", "clusters": "", "cacheMillis": 10000, "hosts": [ { "instanceId": "127.0.0.1#3005#DEFAULT#DEFAULT_GROUP@@APISIX-NACOS", "ip": "127.0.0.1", "port": 3005, "weight": 1.0, "healthy": true, "enabled": true, "ephemeral": true, "clusterName": "DEFAULT", "serviceName": "DEFAULT_GROUP@@APISIX-NACOS", "metadata": {}, "instanceHeartBeatInterval": 5000, "instanceHeartBeatTimeOut": 15000, "ipDeleteTimeout": 30000, "instanceIdGenerator": "simple" } ], "lastRefTime": 1643191399694, "checksum": "", "allIPs": false, "reachProtectionThreshold": false, "valid": true}Step 2: Add Nacos Route#
Create a new route using the Admin API provided by Apache APISIX. APISIX selects the service discovery type to use through the upstream.discovery_type field. upstream.service_name needs to be associated with the corresponding service name of the registry. Therefore, when creating a route, specify the service discovery type as nacos.
curl http://127.0.0.1:9080/apisix/admin/routes/1 -H 'X-API-KEY: edd1c9f034335f136f87ad84b625c8f1' -X PUT -i -d '{ "uri": "/nacos/*", "upstream": { "service_name": "APISIX-NACOS", "type": "roundrobin", "discovery_type": "nacos" }}'In the above command, the request header X-API-KEY is the access token of the Admin API, which can be viewed under apisix.admin_key.key in the conf/config.yaml file.
After successful addition, examples of correct returned results are as follows:
{ "action": "set", "node": { "key": "\/apisix\/routes\/1", "value": { "update_time": 1643191044, "create_time": 1643176603, "priority": 0, "uri": "\/nacos\/*", "upstream": { "hash_on": "vars", "discovery_type": "nacos", "scheme": "http", "pass_host": "pass", "type": "roundrobin", "service_name": "APISIX-NACOS" }, "id": "1", "status": 1 } }}In addition, you can also pass other service related parameters in upstream.discovery_args to specify the namespace or group where the service is located. For details, please refer to the official documentation.
Step 3: Verify Configuration Results#
Use the following command to send the request to the route to be configured.
curl -i http://127.0.0.1:9080/nacos/Examples of correct returned results are as follows:
HTTP/1.1 200 OKContent-Type: text/plain; charset=utf-8Content-Length: 11Connection: keep-aliveDate: Thu, 27 Jan 2022 00:48:26 GMTServer: APISIX/2.12.0
Hello WorldIt can be seen from the example that the new route in Apache APISIX can find the correct service address through Nacos service discovery and respond normally.
Summary#
This article introduces the concept of registry center and how Apache APISIX cooperates with Nacos to implement routing proxy based on service discovery. Users can use Apache APISIX and Nacos according to their business requirements and past technology architecture to realize the proxy and routing and forwarding capabilities of interface services.
To get more information about the nacos plugin description and full configuration list, you can refer to the Apache APISIX's official documentation.
Apache APISIX is also currently working on additional plugins to support the integration of additional services, so if you are interested, feel free to start a discussion in GitHub Discussion, or via the mailing list to communicate.