
This article describes the authentication features of Apache APISIX, in terms of importance and usage.
Authentication is a very common feature in daily life, and we all come across it in our daily lives. For example, face recognition when using Alipay, fingerprint/face clocking in and out of work, and password login on websites are all scenarios of authentication.
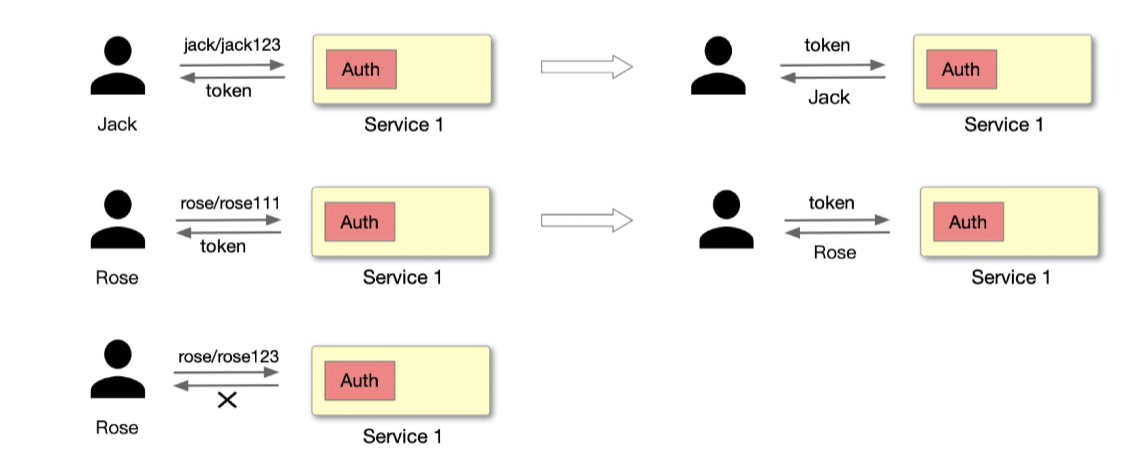
As shown above, Jack requests a server-side application with an account password, and the server-side application needs a module dedicated to authentication to handle this part of the logic. After the request is processed, if the JWT Token authentication method is used, the server will provide a Token to identify the user as Jack. If the account password is entered incorrectly during the login process, it will lead to authentication failure. This scenario must be very familiar to everyone, so we won't expand the example here.
What is the significance of network authentication#
Security#
Authentication ensures the security of back-end services and avoids unauthorized access, thus ensuring the security of data. For example, it prevents certain hacking attacks, and some malicious calls, which can be blocked by authentication.
Practicality#
From the perspective of practicality, it can be more convenient to record the operator or caller. For example, clocking in at work is actually a way to record "who performed this operation" to count employees' work information.
Secondly, it can record the access frequency and frequency of access. For example, it can record the frequency and frequency of requests initiated by a user in the last few minutes, which can determine how active the user is, and also whether it is a malicious attack, etc.
Functionality#
At the functional level, it can handle operations with different privileges for different identities by identifying them. For example, in a company, you cannot use certain pages or services with your identity authority. To be more detailed, it can do some related technical restriction policies for different identities or different API interface callers, such as limiting the flow and speed, etc., so as to achieve different functional restrictions according to different users (callers).
Benefits of centralized authentication with Apache APISIX#
From traditional to new model#
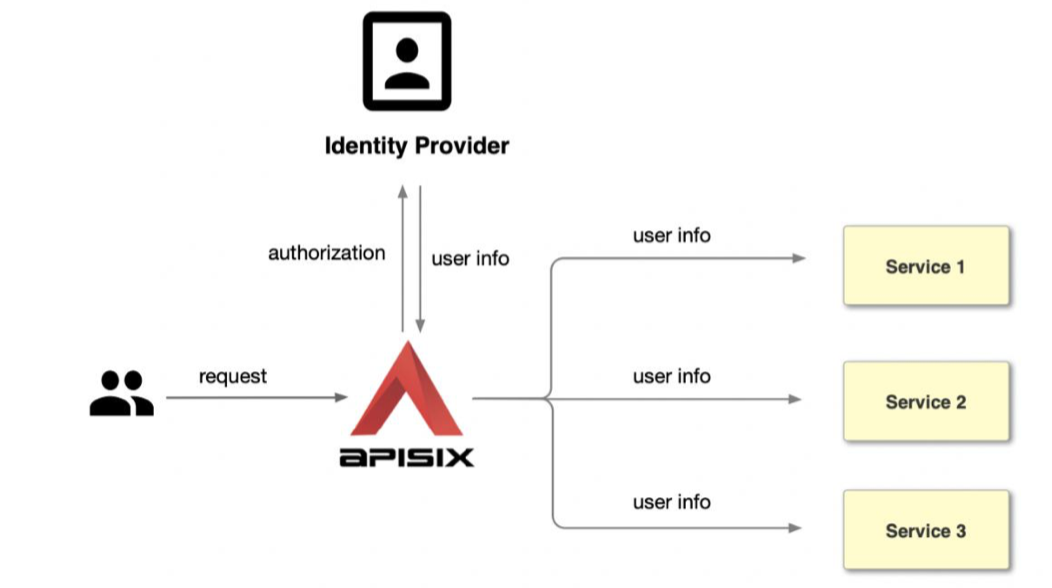
As shown in the figure below, the diagram on the left shows us a more common traditional authentication approach. Each application service module goes to develop a separate authentication module that is used to support a set of process handling for authentication. But when the volume of services increases, it becomes clear that the development workload of these modules is huge and repetitive.
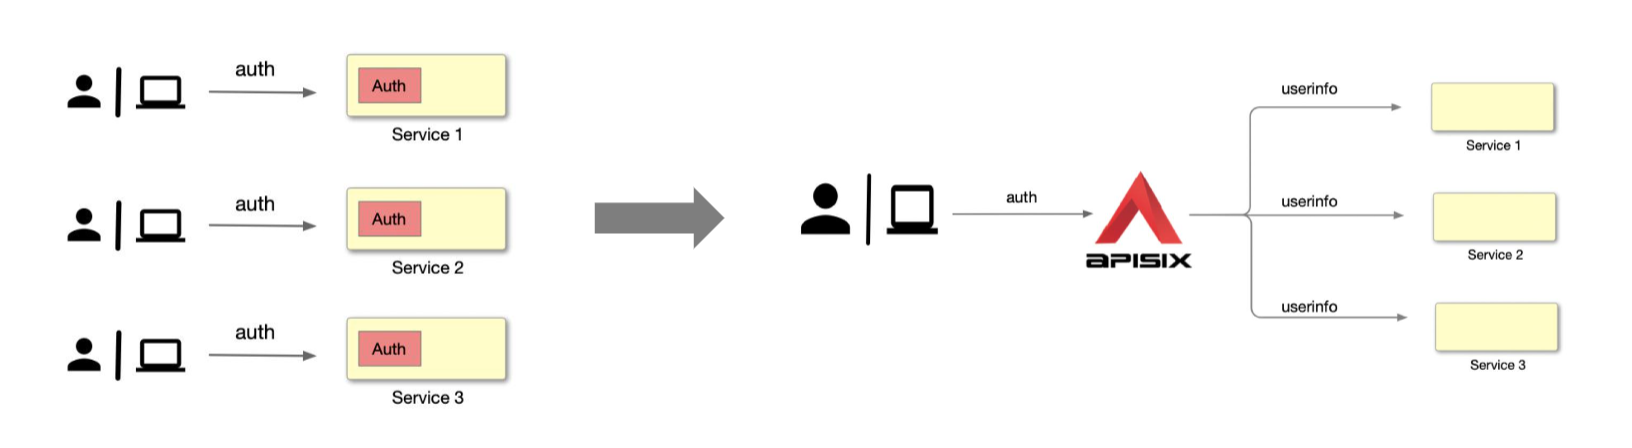
At such times, we can achieve unification and reduce the amount of development by placing this part of the development logic in the Apache APISIX gateway.
As shown in the figure on the right, the user or application party goes directly to request Apache APISIX, and then Apache APISIX passes the authenticated identity information to the upstream application service after it has been identified and authenticated. After that, the upstream application service can read this information from the request header and then process the subsequent related work.
After the general process, let's list it in detail.
Benefit 1: Configuration convergence, unified management#
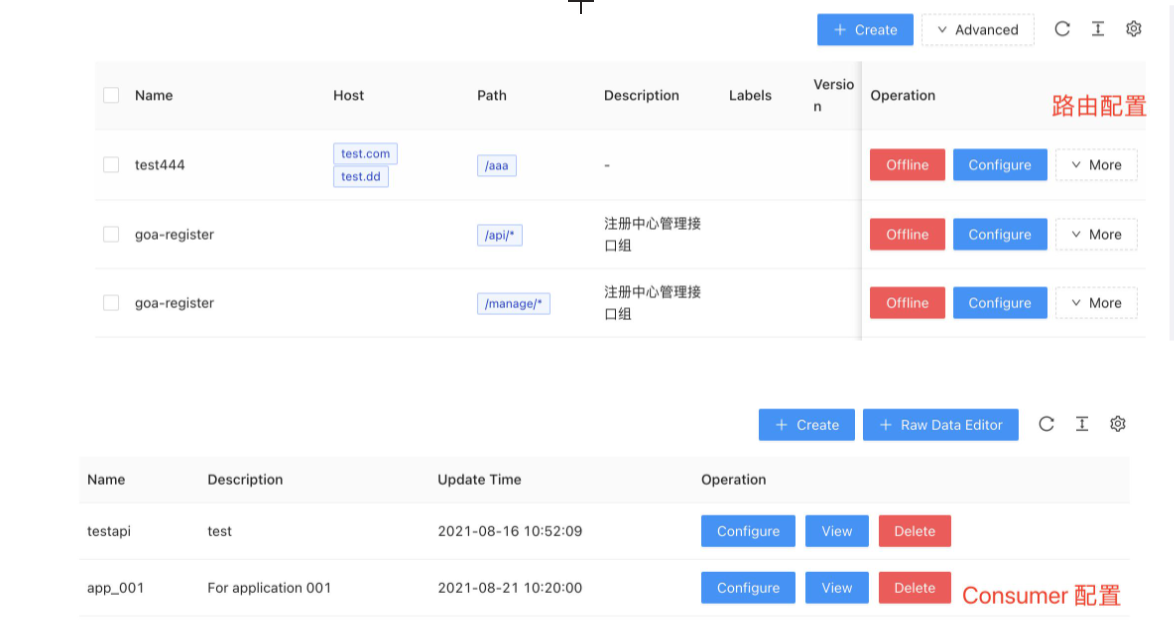
The screenshot above is a screenshot of the APISIX-Dashboard interface, you can see the routing, Consumer and other data information. The Consumer here can be understood as an application party, for example, you can create a Consumer specifically for the application and configure related authentication plugins, such as JWT, Basic-Auth, etc. When there is a new service, we need to create another Consumer, and then configure this part of the configuration information to the second application service.
Through centralized authentication, we can converge and unify the customer configuration and achieve the effect of reducing the operation and maintenance cost.
Benefit 2: Rich plug-ins, reduced development#
Apache APISIX, as an API gateway, is now open to cooperation with various plug-in functions for adaptation, and the plug-in library is relatively rich. At present, it can already work with a large number of authentication-related plug-ins, as shown in the following figure.
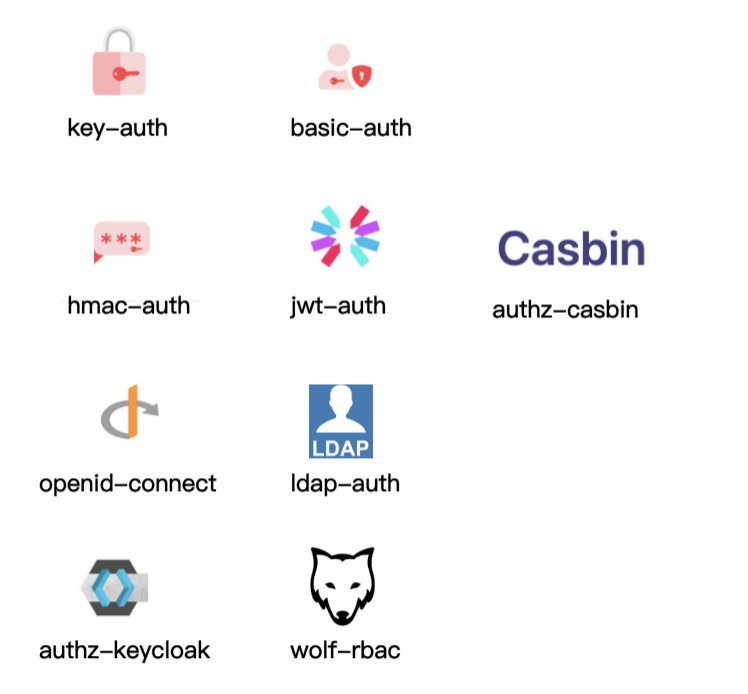
Basic authentication plug-ins such as Key-Auth, Basic-Auth, they are authenticated by way of account password.
More complex authentication plugins such as Hmac-Auth, JWT-Auth. e.g. Hmac-Auth generates a signature by doing some encryption on the request information. When the API caller carries this signature to the Apache APISIX gateway Apache APISIX calculates the signature with the same algorithm and passes it only if the signer and the application caller are authenticated the same.
The Authz-casbin plugin is a project currently being developed by Apche APISIX in collaboration with the Casbin community. The principle of the application is to handle role-based authority control (RBAC) and ACL-related operations according to Casbin rules.
Others are generic authentication protocols and collaborative authentication protocols with third-party components, such as OpenID-Connect authentication mechanism, and LDAP authentication.
Benefit 3: Flexible and powerful configuration#
How to understand powerful is that Apache APISIX can do different levels of plug-in configuration for each Consumer (i.e., caller application).

As shown above, we have created two consumers Consumer A and Consumer B. If we apply Consumer A to Application 1, subsequent accesses to Application 1 will enable this part of Consumer A's plugins, such as IP blacklisting, limiting the number of concurrency, etc. If we apply Consumer B to Application 2, the access log of Application 2 will be sent to the logging system for collection via HTTP since the http-log plugin is enabled.
How to play with authentication in Apache APISIX#
Regarding the play of Apache APISIX authentication, here is a recommendation of three stages of play for your reference only, or you can use and apply them in more depth on the basis of these.
Primary: General play#
Ordinary play is recommended based on Key-Auth, Basic-Auth, JWT-Auth and Hmac-Auth, the use of these plug-ins need to be associated with the use of Consumer.
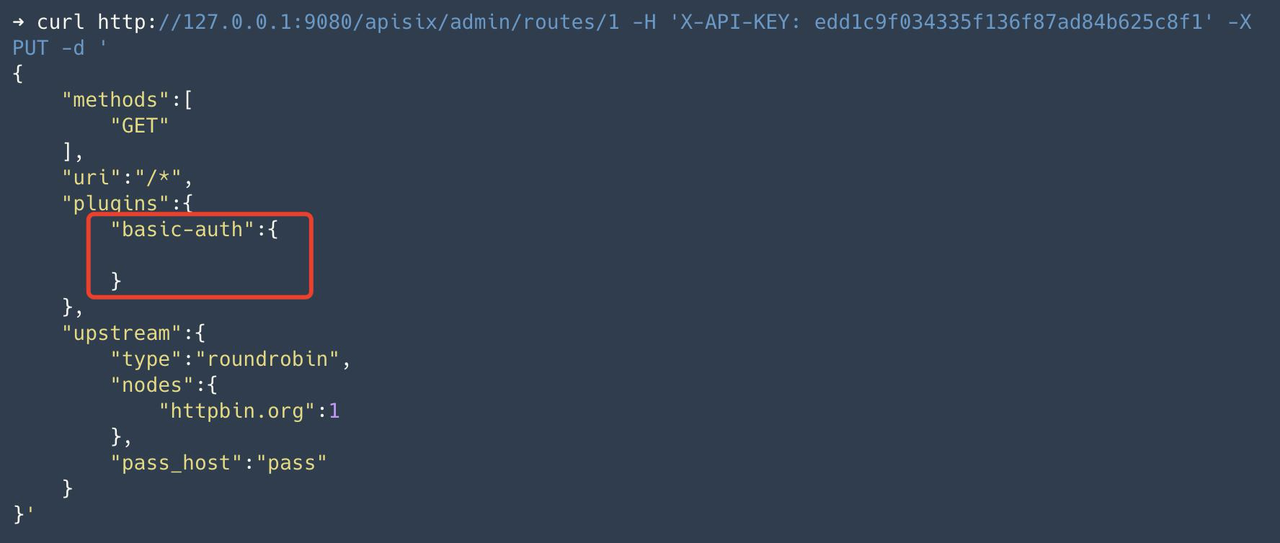
Step 1: Create a route and configure the authentication plugin#
Create a route, configure the upstream as httpbin.org and enable the basic-auth plugin.
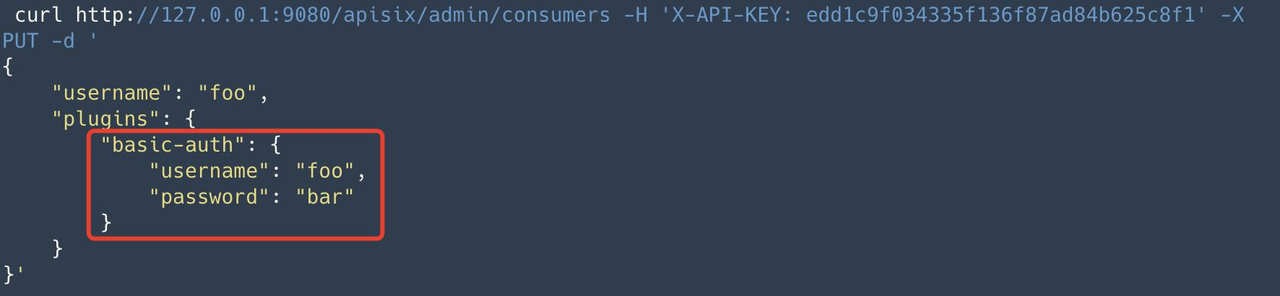
Step 2: Create consumer and configure identity information#
Create the consumer foo. In the consumer, we need to configure the user authentication information, e.g. username for foo and password for bar.
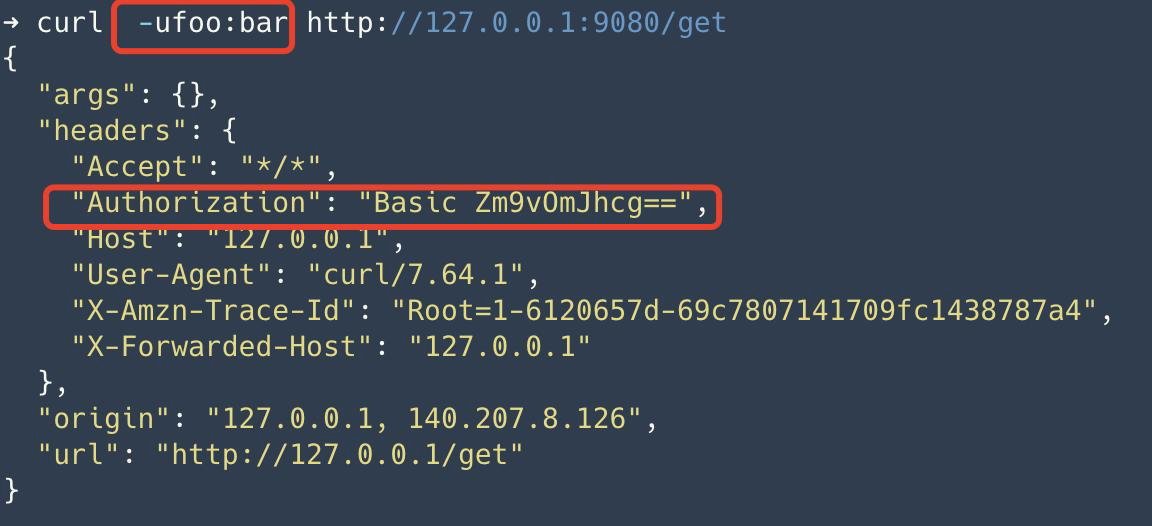
Step 3: Application service carries authentication information for access#
The application accesses Apache APISIX with username:foo,password: bar. Apache APISIX is authenticated and carries the request Authorization request header upstream to httpbin.org. Since the get interface in httpbin.org returns the request information, we can observe the request header Authorization in it.
Intermediate usages of authentication#
The intermediate mode is to use Apache APISIX with the OpenID-Connect plugin to interface to third-party authentication services. openID-Connect is an authentication mechanism that can be used to interface to a user's user management system or user management services, such as Authing and Tencent Cloud in China, Okta and Auth0, etc.
The details are as follows, using Okta cloud service as an example.
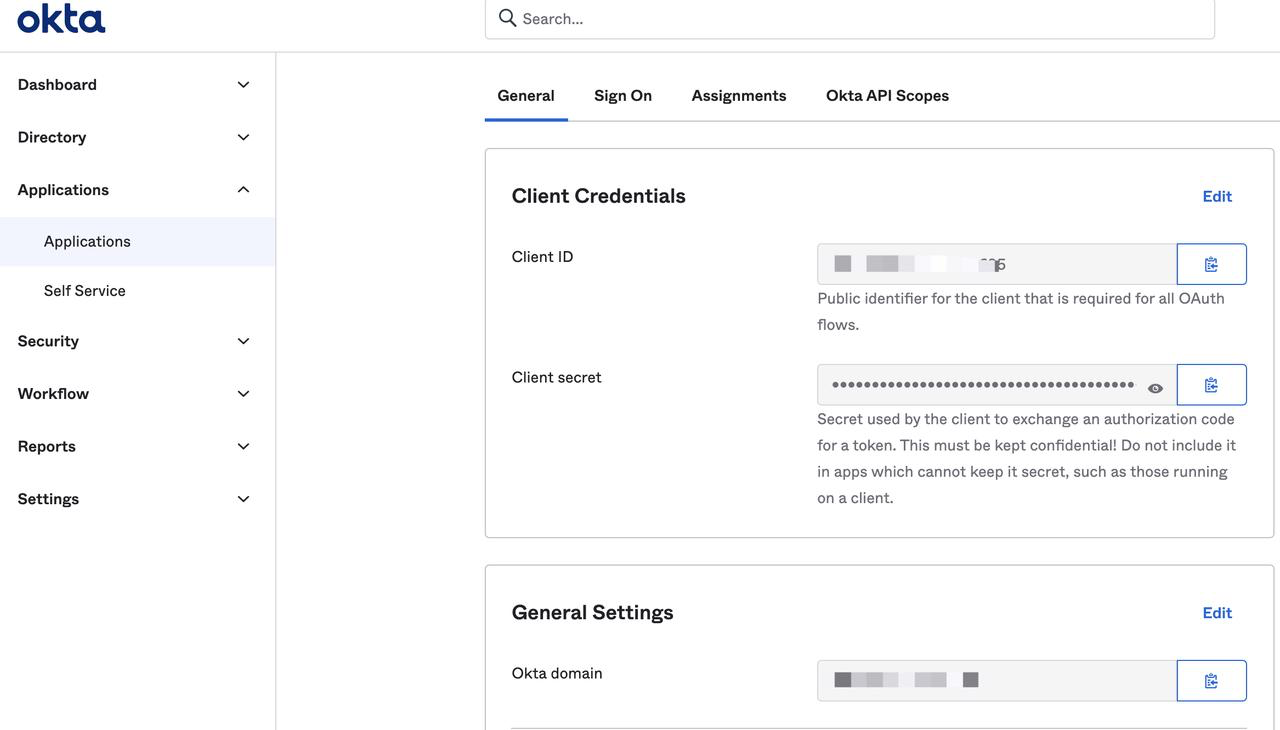
Step 1: Create an OpenID-Connect application#
Create an application that supports OpenID-Connect from the Okta console page.
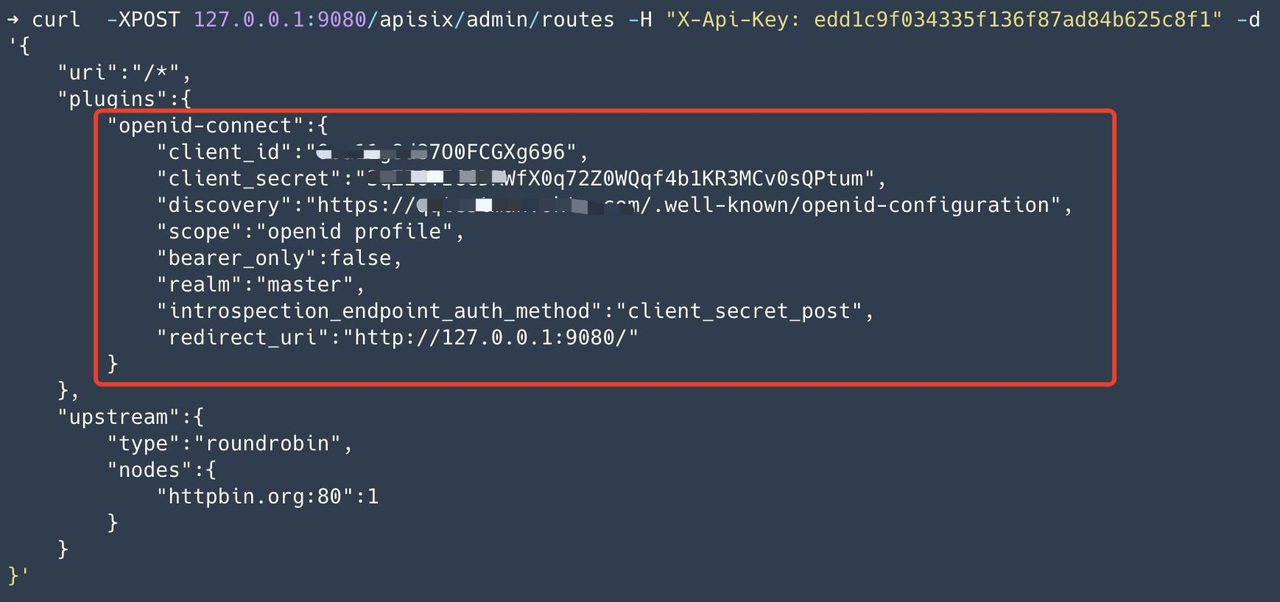
Step 2: Create a route and configure the OpenID-Connect plug-in#
Create a route, configure the upstream address to httpbin.org, and enable the openid-connect plug-in, and fill in the configuration of the Okta application into the openid-connect plug-in.
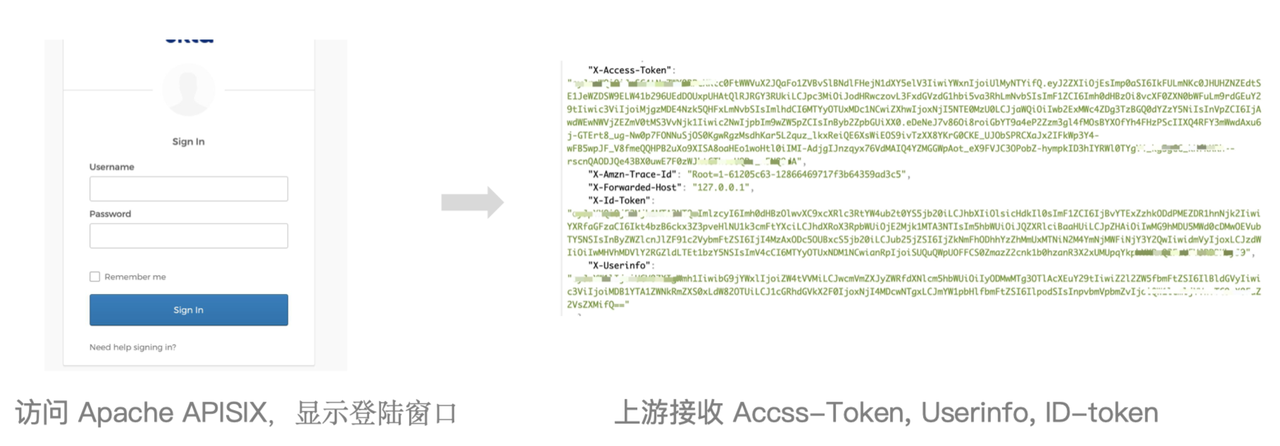
Step 3: When the user visits, it will jump to the login page. After the login is complete, the upstream application gets the user information#
At this point, when the user accesses Apache APISIX, they will first be redirected to the Okta login page. At this point, you need to fill in the account password of the user that already exists in Okta. After login is completed, Apache APISIX will carry the Access-Token and ID-Token to the upstream, and encode the authenticated user information in base64 in the Userinfo request header and pass it to the upstream.
Advanced: upload your own code snippets through the Serverless plug-in#
The DIY gameplay provided here makes use of the Serverless plugin, which is feature-rich and has a lot of ways to play. If you have your own use of play, you are also welcome to communicate in the community.
The specific operation process is to upload their own code snippets through the Serverless plug-in to Apache APISIX, the process of Serverless plug-in support dynamic configuration and hot updates.
Method 1: Custom judgment logic#
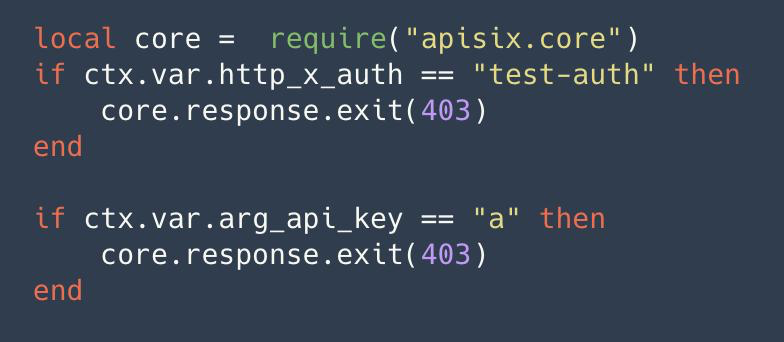
Some judgments are made by request headers, parameters and other related information. By this approach, we can go to implement some of our own rules, such as combining some internal authentication of the enterprise, or go to write some of our own business logic.
Method 2: Initiate authentication request#
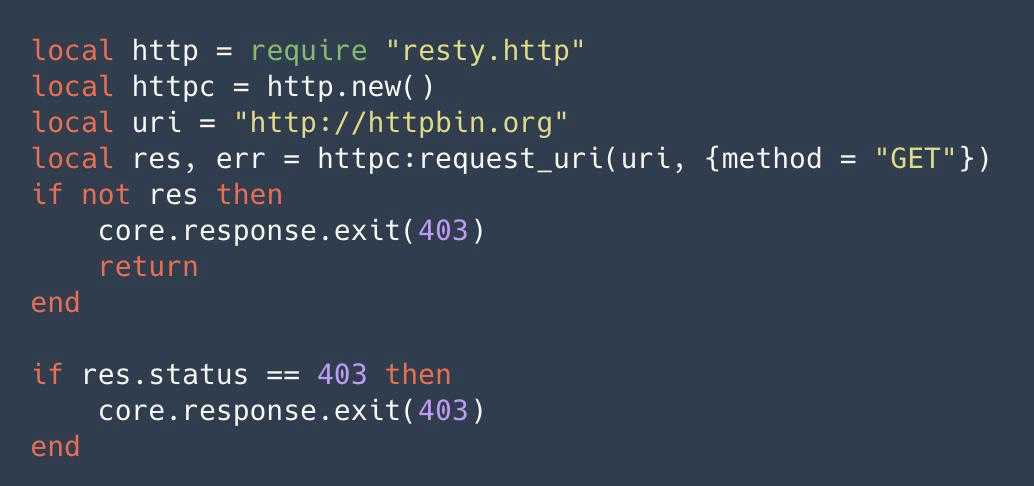
By initiating an HTTP request through the HTTP library, we can use a third-party service to do some authentication and authentication related things and then parse the returned results. In this way, we can do a lot of things that can be extended. For example, interfacing to Redis or a database, as long as it's over TCP or UDP, can be attempted with the Serverless plugin.
Upload Configurations#
After completing the custom code snippet, we create the route and configure the snippet to the Serverless plugin. Later, we will test if the plugin is working by accessing Apache APISIX and getting the appropriate feedback.
