jwt-auth
目录#
名字#
jwt-auth 是一个认证插件,它需要与 consumer 一起配合才能工作。
添加 JWT Authentication 到一个 service 或 route。 然后 consumer 将其密钥添加到查询字符串参数、请求头或 cookie 中以验证其请求。
有关 JWT 的更多信息,可参考 JWT 查看更多信息。
属性#
| 名称 | 类型 | 必选项 | 默认值 | 有效值 | 描述 |
|---|---|---|---|---|---|
| key | string | 必须 | 不同的 consumer 对象应有不同的值,它应当是唯一的。不同 consumer 使用了相同的 key ,将会出现请求匹配异常。 | ||
| secret | string | 可选 | 加密秘钥。如果您未指定,后台将会自动帮您生成。 | ||
| public_key | string | 可选 | RSA 公钥, algorithm 属性选择 RS256 算法时必填 | ||
| private_key | string | 可选 | RSA 私钥, algorithm 属性选择 RS256 算法时必填 | ||
| algorithm | string | 可选 | "HS256" | ["HS256", "HS512", "RS256"] | 加密算法 |
| exp | integer | 可选 | 86400 | [1,...] | token 的超时时间 |
| base64_secret | boolean | 可选 | false | 密钥是否为 base64 编码 |
接口#
插件会增加 /apisix/plugin/jwt/sign 这个接口,你可能需要通过 interceptors
来保护它。
如何启用#
- 创建一个 consumer 对象,并设置插件
jwt-auth的值。
curl http://127.0.0.1:9080/apisix/admin/consumers -H 'X-API-KEY: edd1c9f034335f136f87ad84b625c8f1' -X PUT -d '{ "username": "jack", "plugins": { "jwt-auth": { "key": "user-key", "secret": "my-secret-key" } }}'jwt-auth 默认使用 HS256 算法,如果使用 RS256 算法,需要指定算法,并配置公钥与私钥,示例如下:
curl http://127.0.0.1:9080/apisix/admin/consumers -H 'X-API-KEY: edd1c9f034335f136f87ad84b625c8f1' -X PUT -d '{ "username": "kerouac", "plugins": { "jwt-auth": { "key": "user-key", "public_key": "-----BEGIN PUBLIC KEY-----\n……\n-----END PUBLIC KEY-----", "private_key": "-----BEGIN RSA PRIVATE KEY-----\n……\n-----END RSA PRIVATE KEY-----", "algorithm": "RS256" } }}'- 创建 Route 或 Service 对象,并开启
jwt-auth插件。
curl http://127.0.0.1:9080/apisix/admin/routes/1 -H 'X-API-KEY: edd1c9f034335f136f87ad84b625c8f1' -X PUT -d '{ "methods": ["GET"], "uri": "/index.html", "plugins": { "jwt-auth": {} }, "upstream": { "type": "roundrobin", "nodes": { "39.97.63.215:80": 1 } }}'你可以使用 APISIX Dashboard,通过 web 界面来完成上面的操作。
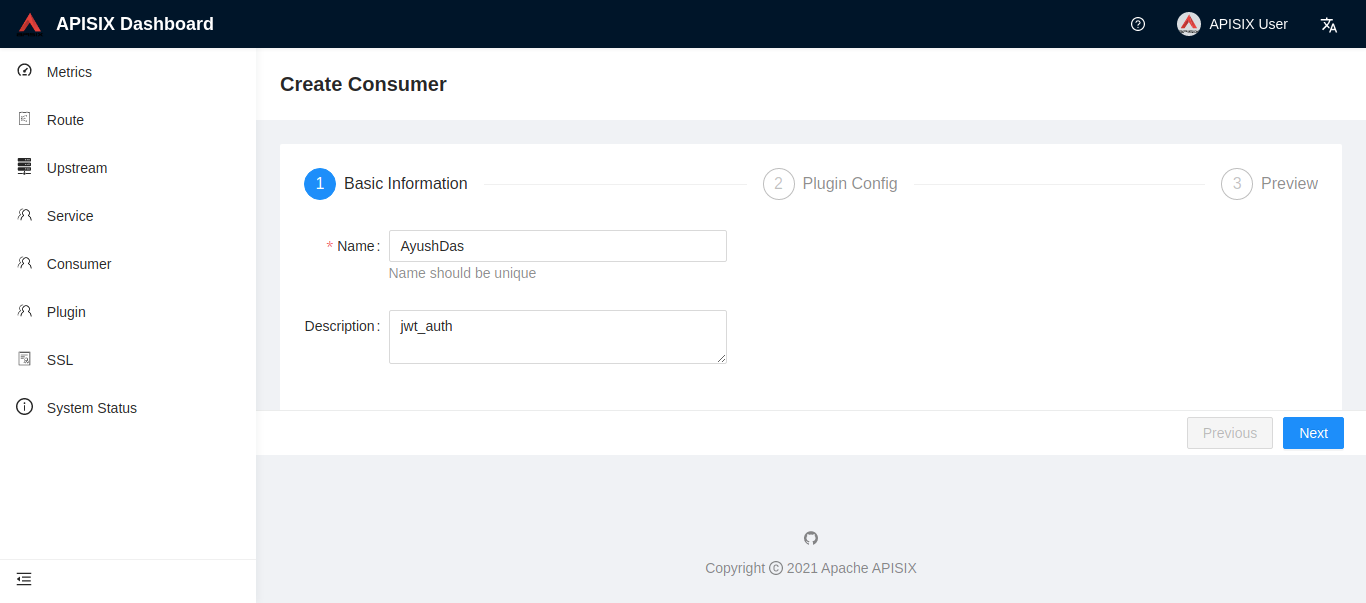
- 先增加一个 consumer:

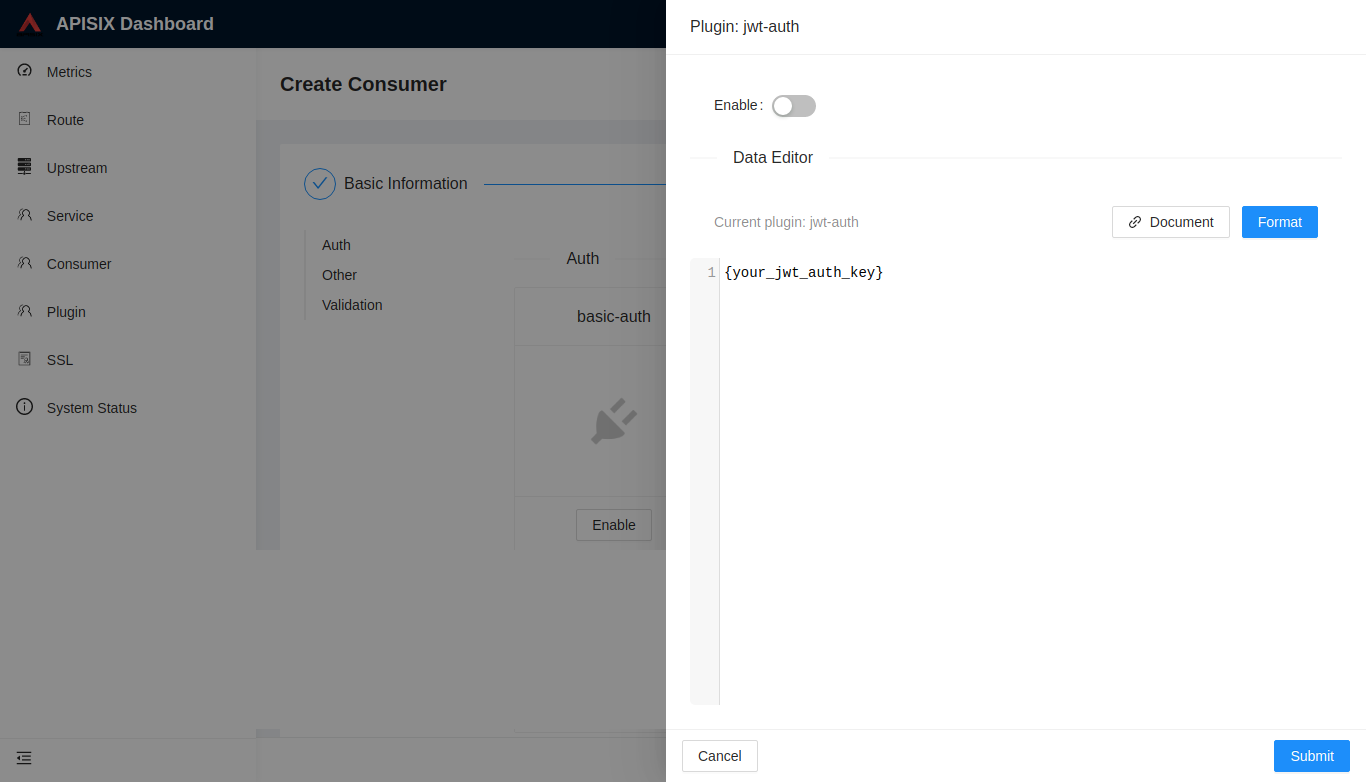
然后在 consumer 页面中添加 jwt-auth 插件:

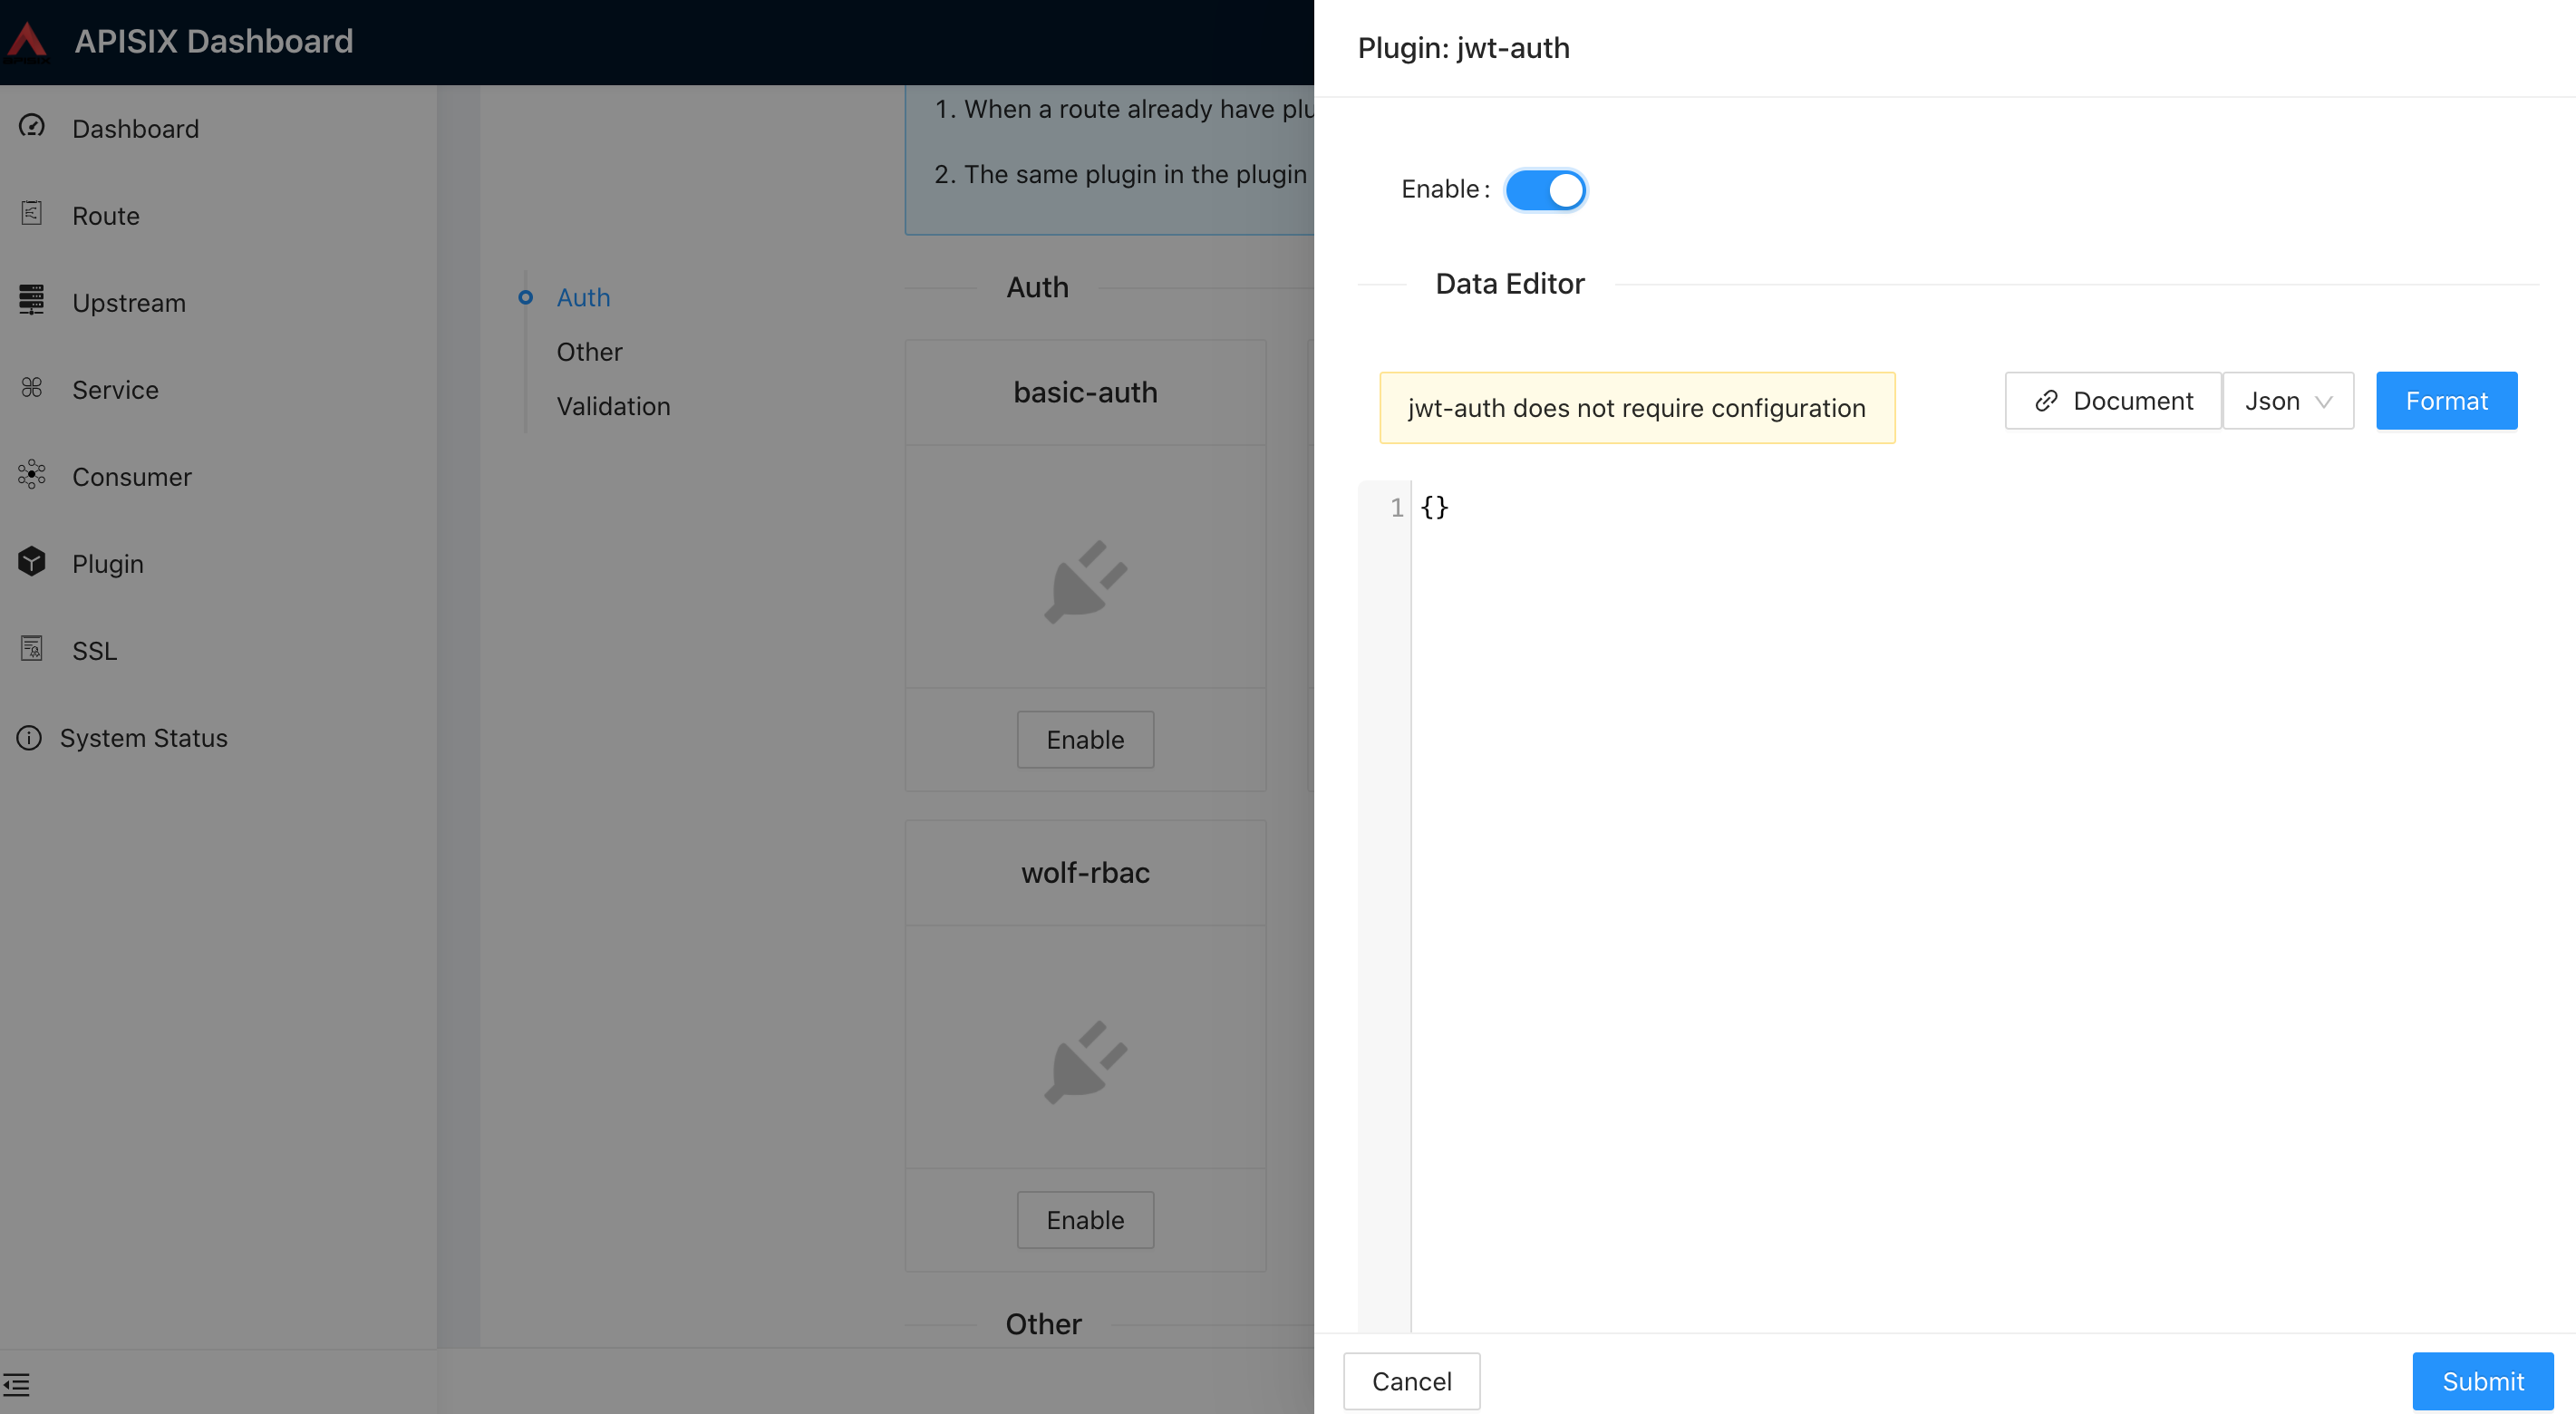
- 创建 Route 或 Service 对象,并开启 jwt-auth 插件:

测试插件#
首先进行登录获取 jwt-auth token:#
- 没有额外的payload:
$ curl http://127.0.0.1:9080/apisix/plugin/jwt/sign?key=user-key -iHTTP/1.1 200 OKDate: Wed, 24 Jul 2019 10:33:31 GMTContent-Type: text/plainTransfer-Encoding: chunkedConnection: keep-aliveServer: APISIX web server
eyJhbGciOiJIUzI1NiIsInR5cCI6IkpXVCJ9.eyJrZXkiOiJ1c2VyLWtleSIsImV4cCI6MTU2NDA1MDgxMX0.Us8zh_4VjJXF-TmR5f8cif8mBU7SuefPlpxhH0jbPVI- 有额外的payload:
$ curl -G --data-urlencode 'payload={"uid":10000,"uname":"test"}' http://127.0.0.1:9080/apisix/plugin/jwt/sign?key=user-key -iHTTP/1.1 200 OKDate: Wed, 21 Apr 2021 06:43:59 GMTContent-Type: text/plain; charset=utf-8Transfer-Encoding: chunkedConnection: keep-aliveServer: APISIX/2.4
eyJ0eXAiOiJKV1QiLCJhbGciOiJIUzI1NiJ9.eyJ1bmFtZSI6InRlc3QiLCJ1aWQiOjEwMDAwLCJrZXkiOiJ1c2VyLWtleSIsImV4cCI6MTYxOTA3MzgzOX0.jI9-Rpz1gc3u8Y6lZy8I43RXyCu0nSHANCvfn0YZUCY使用获取到的 token 进行请求尝试#
- 缺少 token
$ curl http://127.0.0.1:9080/index.html -iHTTP/1.1 401 Unauthorized...{"message":"Missing JWT token in request"}- token 放到请求头中:
$ curl http://127.0.0.1:9080/index.html -H 'Authorization: eyJhbGciOiJIUzI1NiIsInR5cCI6IkpXVCJ9.eyJrZXkiOiJ1c2VyLWtleSIsImV4cCI6MTU2NDA1MDgxMX0.Us8zh_4VjJXF-TmR5f8cif8mBU7SuefPlpxhH0jbPVI' -iHTTP/1.1 200 OKContent-Type: text/htmlContent-Length: 13175...Accept-Ranges: bytes
<!DOCTYPE html><html lang="cn">...- token 放到请求参数中:
$ curl http://127.0.0.1:9080/index.html?jwt=eyJhbGciOiJIUzI1NiIsInR5cCI6IkpXVCJ9.eyJrZXkiOiJ1c2VyLWtleSIsImV4cCI6MTU2NDA1MDgxMX0.Us8zh_4VjJXF-TmR5f8cif8mBU7SuefPlpxhH0jbPVI -iHTTP/1.1 200 OKContent-Type: text/htmlContent-Length: 13175...Accept-Ranges: bytes
<!DOCTYPE html><html lang="cn">...- token 放到 cookie 中:
$ curl http://127.0.0.1:9080/index.html --cookie jwt=eyJhbGciOiJIUzI1NiIsInR5cCI6IkpXVCJ9.eyJrZXkiOiJ1c2VyLWtleSIsImV4cCI6MTU2NDA1MDgxMX0.Us8zh_4VjJXF-TmR5f8cif8mBU7SuefPlpxhH0jbPVI -iHTTP/1.1 200 OKContent-Type: text/htmlContent-Length: 13175...Accept-Ranges: bytes
<!DOCTYPE html><html lang="cn">...禁用插件#
当你想去掉 jwt-auth 插件的时候,很简单,在插件的配置中把对应的 json 配置删除即可,无须重启服务,即刻生效:
$ curl http://127.0.0.1:2379/v2/keys/apisix/routes/1 -X PUT -d value='{ "methods": ["GET"], "uri": "/index.html", "id": 1, "plugins": {}, "upstream": { "type": "roundrobin", "nodes": { "39.97.63.215:80": 1 } }}'